May 03, 2018 / by Adam Murray / In tech
VSTS (YAML) PowerShell Build Pipeline
I’ve been using VSTS (Microsoft’s cloud-hosted development tooling) for the last few years and have been amazed at the new functionality that the company has delivered. It’s becoming a one-stop shop for cross-platform development, with the following main features
- Code management using GIT
- Work management using boards and stories
- Cross-platform build process using hosted or on-premise agents (Windows/Linus/macOS)
- Test management
- Release management
- Package management
Here, I’ll walk through the process of using VSTS’ new YAML build definiton feature to create a build pipeline for a PowerShell module and show how to publish the module to a private VSTS ‘PowerShell Gallery’ using VSTS Package Management.
I’ll also address how to manage any binary bits in your PowerShell module so they don’t bloat your GIT repo. If your module doesn’t include any binary bits, then the Plaster template will exclude those bits from your module/build and you can ignore section 2 of this blog.
- Creating a VSTS project and setting up VSTS Package Management
- Using NuGet to package binary bits
- Scaffolding a PowerShell module using Plaster
- Setting up a build using Invoke-Build
- Creating a VSTS build to publish the module that contains the binaries to VSTS Package Manager
- Use PowerShell package management to install/update the module
- Links
Creating a VSTS project and setting up VSTS package management
VSTS is free for small teams of as many as five users. You can set up an account by following the steps here.
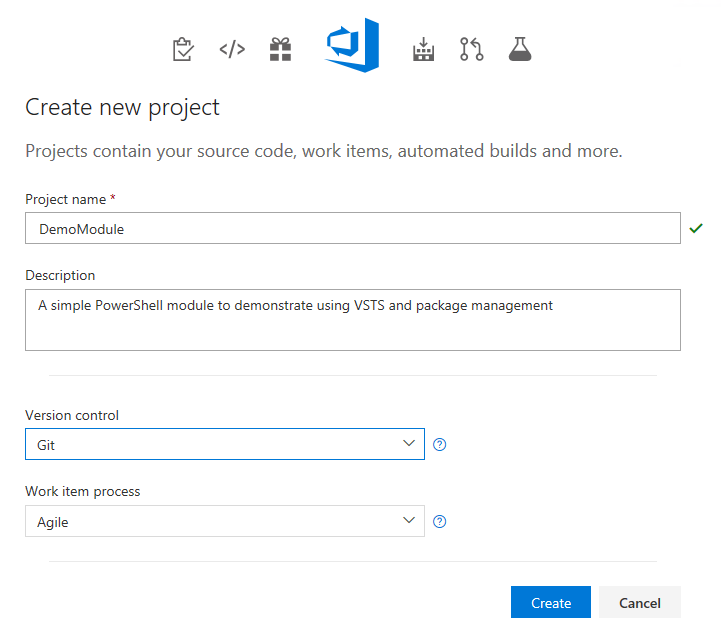
Once you have your account set up, it’s simple to create a new project, as you can see below:
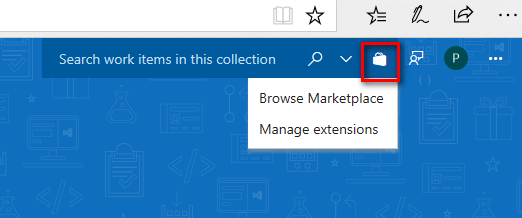
Now that you’ve created your project, you need to add the package management extension to your account. To do this, click on the shopping bag in the top right corner of your browser and select ‘Browse Marketplace’, as shown below:
Search for ‘Package Management’ by Microsoft and follow the bouncing ball to add it to your account. Once you’ve installed it, you’ll see an additional item under ‘Build and Release’ in your project called ‘packages’. Once you select ‘packages’, it will prompt you to create a new feed, as shown below:
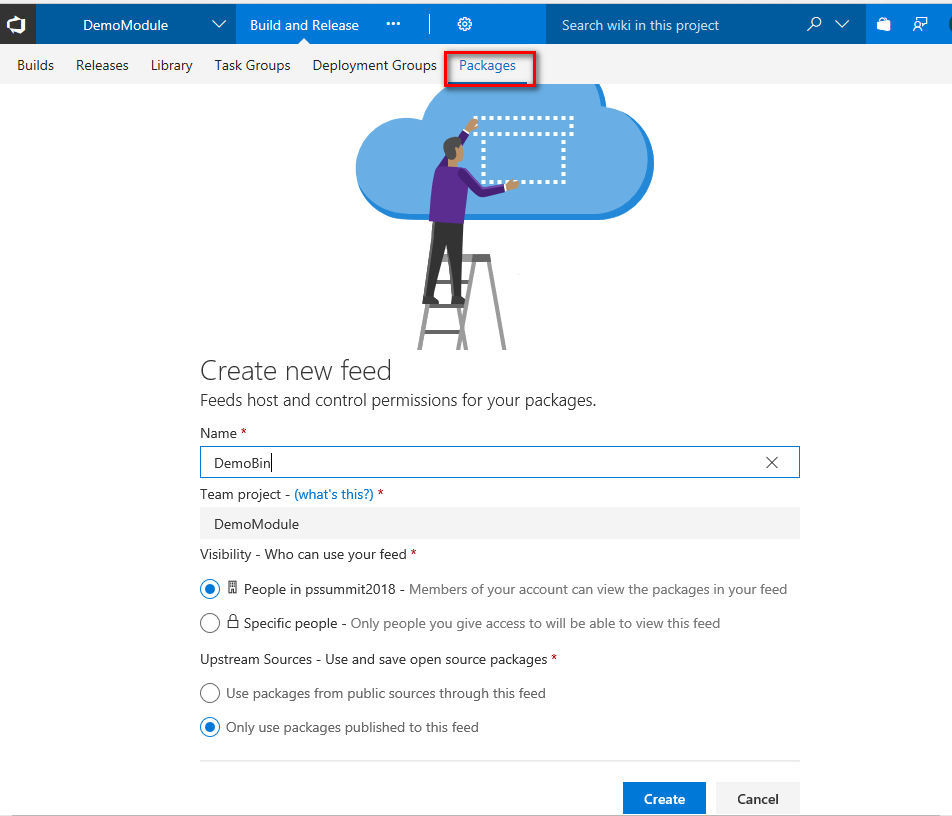
You’ll create two feeds. The first is where you’ll store your module’s binary bits, and the second is for the complete PowerShell module; this one will act as your private PowerShell Gallery.
Name your feeds ‘DemoBin’ and ‘DemoModule’ and set the upstream sources to ‘Only use packages published to this feed’.
Using NuGet to package binary bits
NuGet is a package manager for .Net and is simailar to NPM in the NodeJS world. It allows developers to produce and consume packages. A NuGet package is a zip file with a .nupkg extension.
Interestingly, both Chocolatey and the PowerShell Gallery are built on top of NuGet and use NuGet packages and feeds to provide their base functionality.
For this example module, you’ll create a NuGet package that contains the binary bits and push it to the DemoBin feed that you created earlier.
A couple of examples of when you may want to do this:
- When your module uses an exe and you therefore need to include that in your module
- When your module uses a third-party dll and you need to include that in your module
If you were just to add these to your GIT repo that contains your module, you may significantly increase the size of the repo, which can slow down clone operations and CI processes.
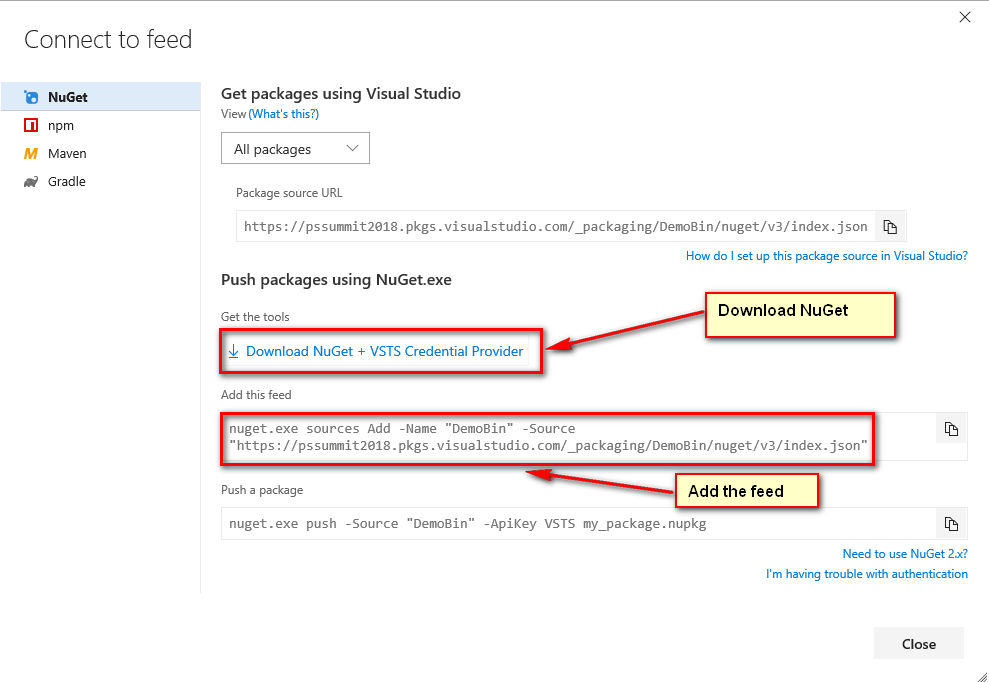
You can use the NuGet client to create, publish and consume NuGet packages.
Download the client from within VSTS. It’s packaged as a zip file that you need to extract into a folder and add to your path. The zip includes the VSTS credential provider so your VSTS credentials can be cached.
Creating a NuGet Package
To create a NuGet package, you need to create a .nuspec file. This is an xml file that contains information/metadata about your package. By creating a standard folder structure, the NuGet client can generate the file for you based on convention. Find more details here
Create a new folder with another subfolder called ‘lib’ that contains your exe’s/dll’s.
Running the following command from your folder will generate a template .nuspec that you can customise
nuget spec
The generated xml will look similar to the following. You should update the contents based on your requirements.
<?xml version="1.0"?>
<package >
  <metadata>
    <id>my.nuget.package</id>
    <version>1.0.0</version>
    <authors>Adam</authors>
    <owners>Adam</owners>
    <requireLicenseAcceptance>false</requireLicenseAcceptance>
    <description>My PowerShell Binaries</description>
    <releaseNotes>Initial package.</releaseNotes>
    <copyright>Copyright 2018</copyright>
  </metadata>
</package>
Once your .nuspec is updated, creating the NuGet package is as simple as running the following command from the folder that contains your .nuspec file. You will receive a warning about ‘Assembly not inside a framework folder’ that you can ignore.
nuget pack
Now you have a .nupkg that you can publish to your DemoBin feed using the following command.
nuget push -source DemoBin -ApiKey VSTS my.nuget.package.1.0.0.nupkg
The first time you run the command against your account, you’ll be prompted for your VSTS credentials. Subsequent tasks with NuGet in which you specify the ApiKey as ‘VSTS’ will use your cached credentials.
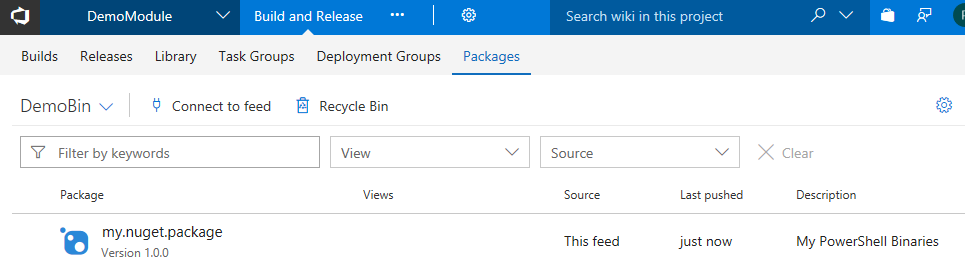
Now you can navigate back to your DemoBin feed and should be able to see the package as shown below:
Scaffolding a PowerShell module using Plaster
Plaster is a PowerShell module available from the PowerShell Gallery that allows you to scaffold new projects. You can customise the scaffold to your needs; it helps speed up development and ensures consistency across projects.
I’ve created a Plaster template that includes my default structure and build process. You can clone it from here.
Once you clone the template, you can invoke it.
cd \repos
git clone https://github.com/tikabu/TikabuPSModuleTemplate
install-module plaster
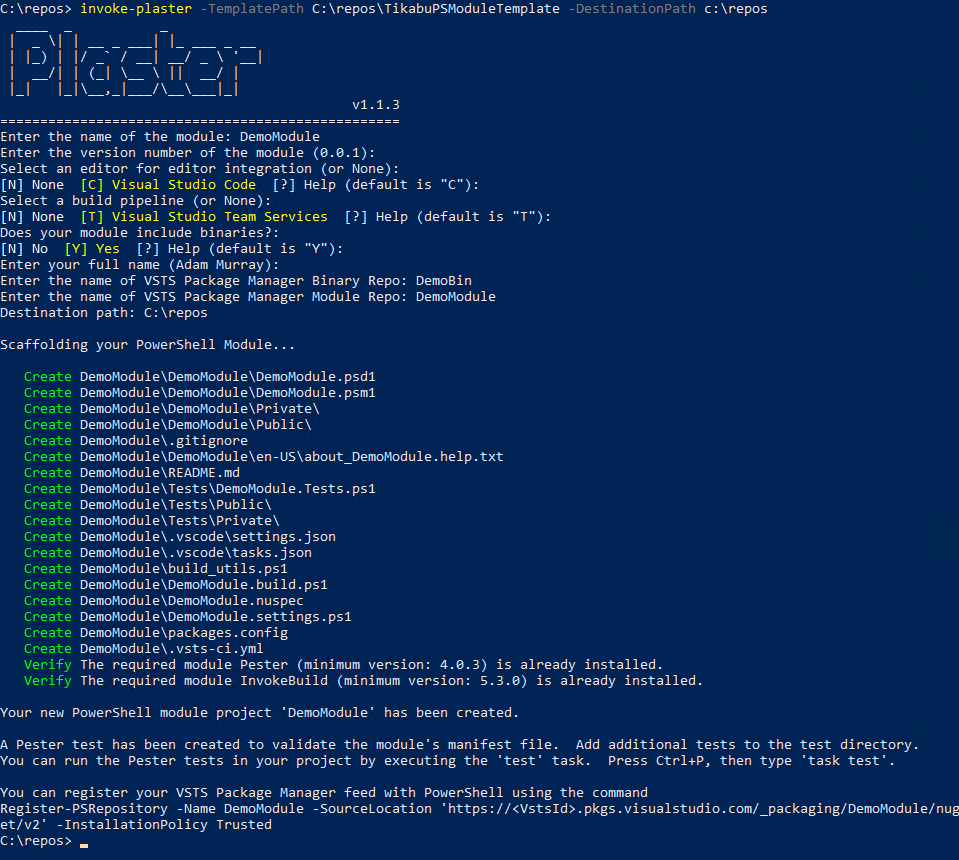
invoke-plaster -TemplatePath C:\repos\TikabuPSModuleTemplate -DestinationPath c:\repos
When you run the command, you’ll be prompted to provide information about your module.
Now you can start adding your functions and Pester tests. I use a public/private folder structure to separate public versus private functions.
A couple of files in the root of the project require further explanation.
Packages.config
This file is used to tell NuGet what packages are required.
.vsts-ci.yml
This file contains the VSTS build tasks and, when pushed to the VSTS GIT repo, VSTS will create the build based on the contents of this file.
.gitignore
This file tells GIT which folders to exclude from the repo. This ensures your binary bits and build files don’t end up in GIT.
Setting up a build using Invoke-Build
According to the Invoke-Build GitHub page, “Invoke-Build is a build and test automation tool which invokes tasks defined in PowerShell v2.0+ scripts. It is similar to psake but arguably easier to use and more powerful. It is complete, bug free, well covered by tests.”
One of the main reasons to use Invoke-Build or PSake is that it allows you to define your build process as tasks. Another advantage is that it makes your build process more portable; you can also run most components of your build locally. If, in the future, you decide to change build systems, it’s easier, as your build process is mainly defined within your Invoke-Build script, not Jenkins/TeamCity/VSTS, etc.
The Plaster template you used earlier sets up your build scripts. If you look at DemoModule.build.ps1, you can see all the tasks that have been defined.
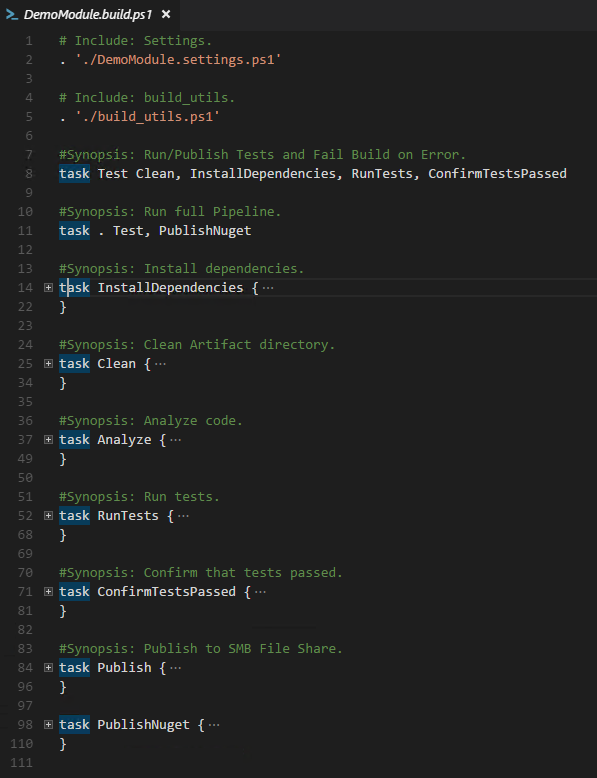
You can also chain tasks. For example, line 8 defines a task called ‘Test’, which chains the Clean, InstallDependencies, RunTests and ConfirmTestsPassed tasks together.
The default task is defined with a ‘.’; you can see it on line 11. It chains the Test task and also adds the PublishNuget task.
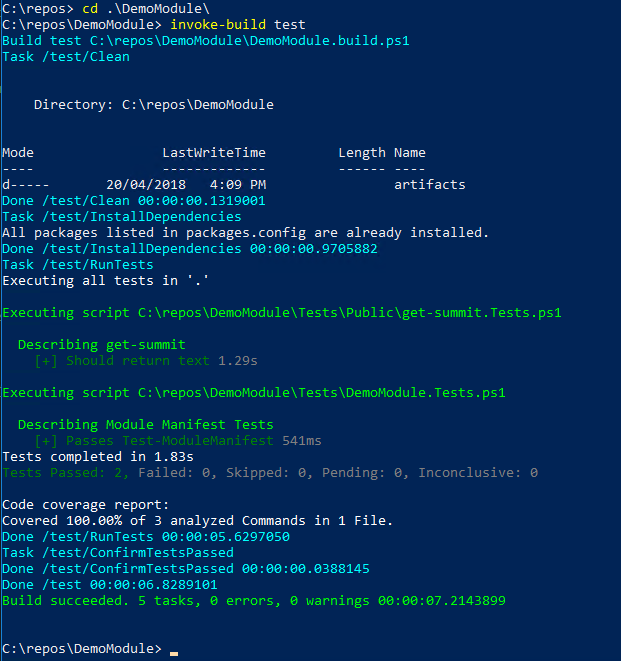
You can invoke the tasks by running `invoke-build <task>’
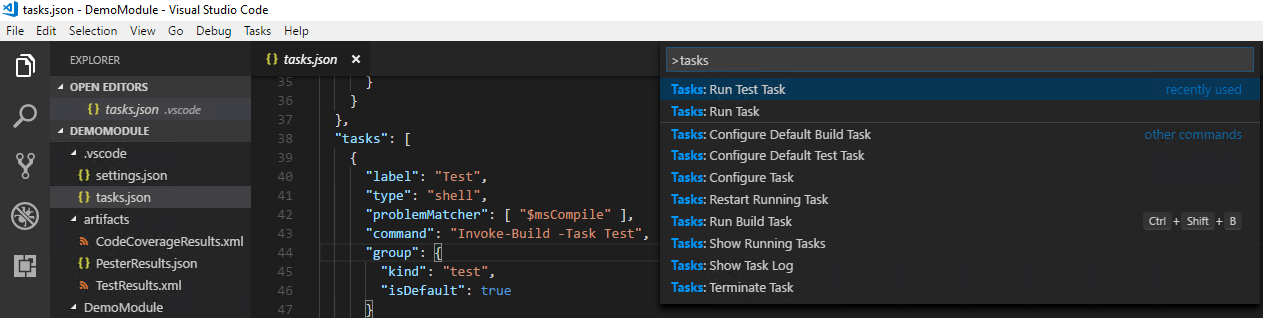
You can also integrate the invoke-build tasks into the VSCode task system; the Plaster template above does it automatically. If you look in your module project folder, you’ll see a folder named ‘.vscode’ that contains a file called tasks.json. This file maps the VSCode tasks to Invoke-Build commands.
To invoke the test task within VSCode, go to the command pallette (Crtl+shift+p), then type tasks and select ‘Run Test Task’.
A couple of tasks require further investigation.
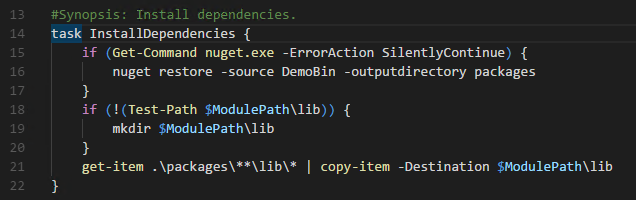
Install Dependencies
This task restores the binary bits from your NuGet feed. Run ‘nuget restore’ using the feed registered earlier. The NuGet restore reads the packages.config file to work out what NuGet packages are required. Line 21 copies the files from the NuGet lib folder to your modules lib folder.
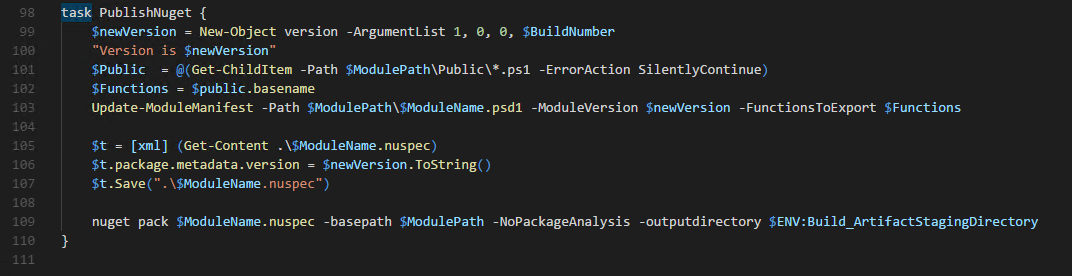
Publish NuGet
Due to a limitation with PowerShell package management, you must generate the modules NuGet package using the NuGet client rather than Publish-Module. This step gets a unique build number from the VSTS-hosted agent, gets all the public functions from the public folder and then updates the module manifest with these details. Finally, it runs NuGet pack, which generates the package.
Note If you wanted to publish to the public PowerShell Gallery you wouldn’t need this step as you could use Publish-Module
Creating a VSTS build to publish the module that contains the binaries to VSTS Package Manager
VSTS released YAML builds in late 2017. This feature allows you to define your build tasks in a YAML file that lives with your code base. As of April 2018, this feature is in preview and has to be enabled for your VSTS account. You can find details on how to do this here.
Once the feature is enabled, VSTS will automatically create the build once the ‘.vsts-ci.yml’ file is pushed to the root of the GIT repo.
The Plaster template configures the ‘.vsts-ci.yml’ file with all the required tasks to build and publish the module.
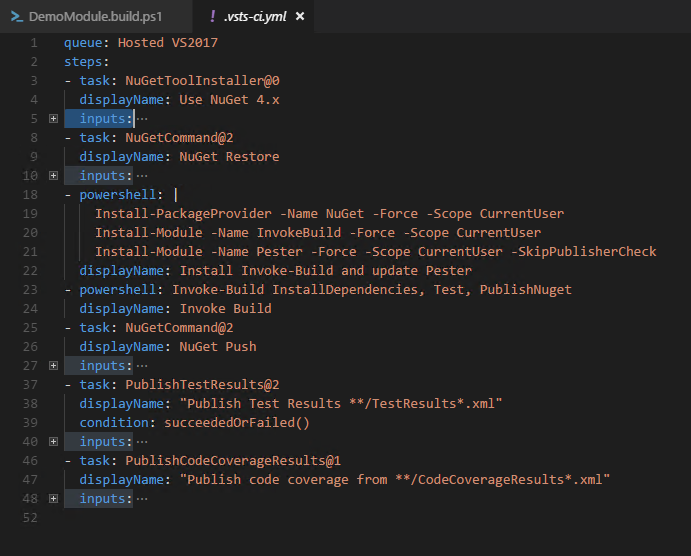
Looking at the tasks in the YAML file, you can see
- Line 3 - Install NuGet
- Line 8 - Does NuGet restore
- Line 18 - Installs InvokeBuild and Pester
- Line 23 - Runs Invoke-Build
- Line 25 - Run NuGet push to publish the module
- Line 37 - Publishes Pester test results
- Line 46 - Publishes Pester code coverage
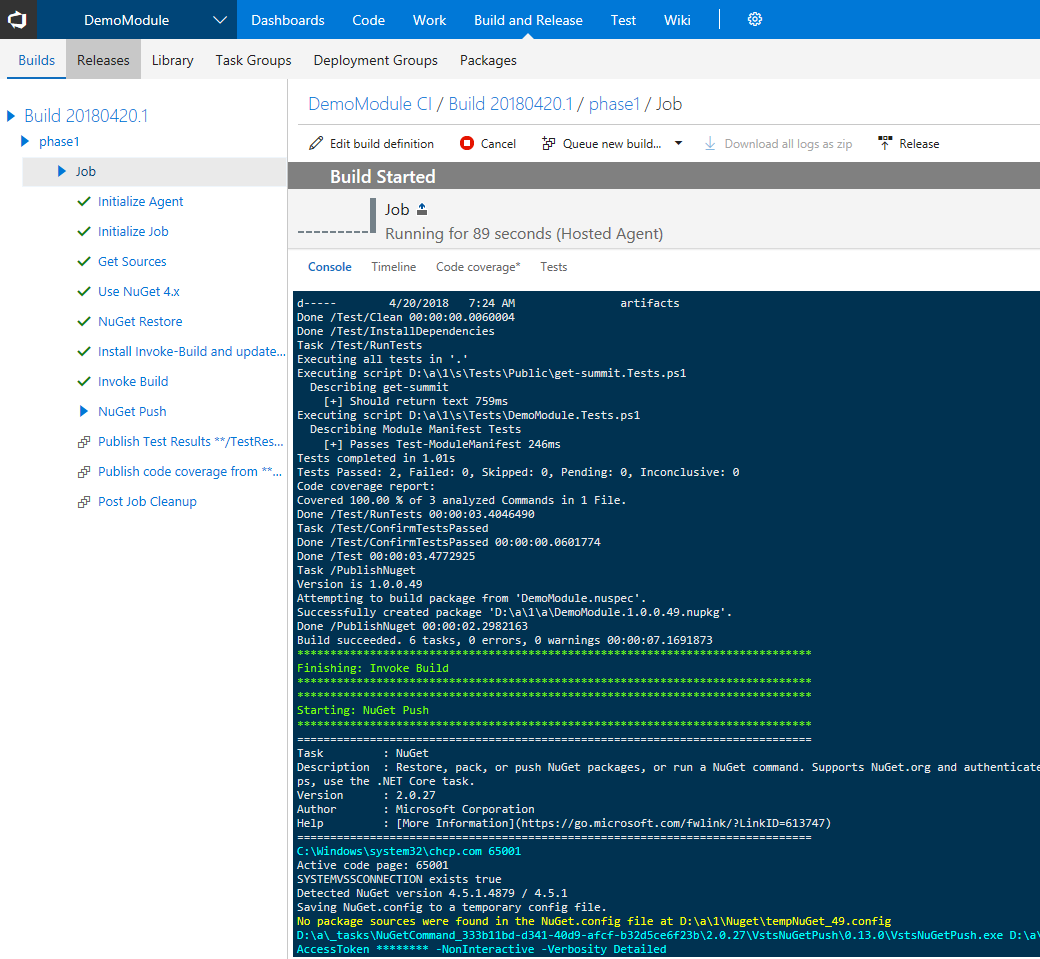
The below shot shows the build running in VSTS
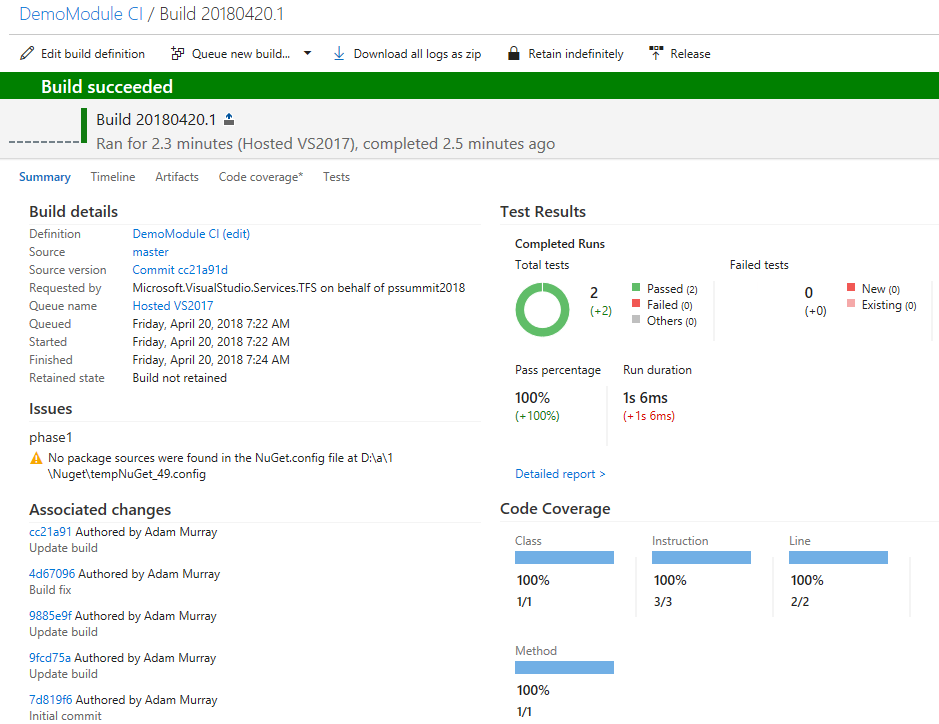
You can see a summary of the build, including the Pester test results and code coverage:
At this stage, if you look at you DemoModule package manager feed, you’ll be able to see the published module.
Use PowerShell package management to install/update the module
You can now register your VSTS module feed with PowerShellGet.
$params = @{
    Name               = 'DemoModule'
    SourceLocation     = 'https://pssummit2018.pkgs.visualstudio.com/_packaging/DemoModule/nuget/v2'
    InstallationPolicy = 'Trusted'
}
Register-PSRepository @params

Find-Module -repository DemoModule -credential $cred
Install-Module demomodule -repoository DemoModule -credential $cred -scope currentuser
Rather than use your VSTS credentials, you can create a Personal Access Token (PAT) that only has access read from package management.
Now that you have your pipeline in place, you can update a function or create a new function and push the code to the VSTS GIT repo. This will kick off a new build and generate a new version of the module.
You can then run the following command to update your module
update-module demomodule -credential $cred
So that you don’t need to specify your credentials and repository each time you can set PowerShell default credentials as follows
$PSDefaultParameterValues = @{"*-module:credential"=$cred;"*-module:repository"="DemoModule"}
You can save $cred to disk as an encrypted file by running
$cred = Get-Credential
$cred | Export-Clixml -path ~\Documents\PackageManager.xml
Then in your profile you can add the following command to load the credential
$cred = Import-Clixml ~\Documents\PackageManager.xml
Links
Rob Sewell has posted a blog here on how he’s using VSTS for dbachecks and it is definitely worth a read
Rob Pleau has done a great blog on Plaster here and I love the blog title